
How to Read Greens in Golf
Learn how to read greens in golf by understanding slope, grain, and speed to improve your putting accuracy and lower your scores.
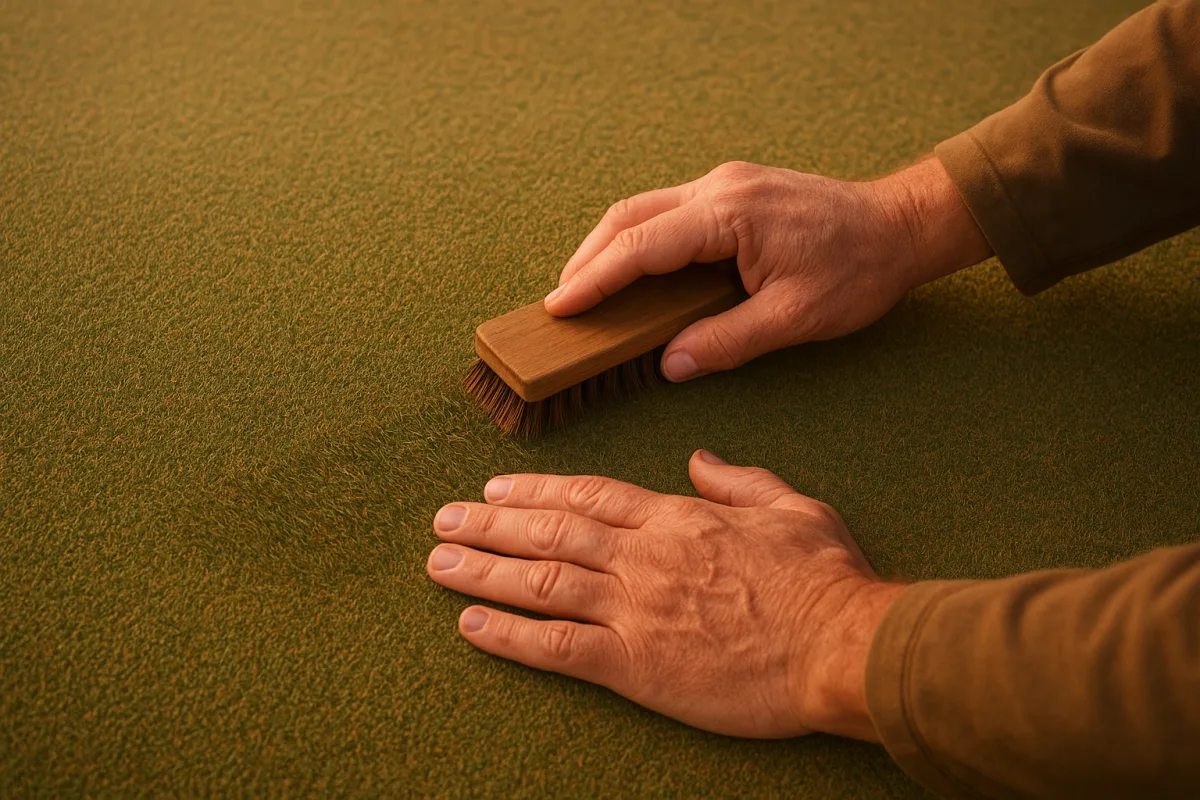
Start with the grass, not the imaginary cup
The first question in reading a green is not, “How much does this putt break?” It is, “What surface am I actually putting on?”
Grain matters a great deal on Bermuda, and far less on bentgrass. On Bermuda, a down-grain putt can run roughly 20 to 30 percent faster than an into-grain putt, and the grain can add break beyond what the visible slope suggests.[3][10] That is enough to turn a read that looks sensible from behind the ball into a missed low-side putt.
Bentgrass is different. It can still have subtle direction from mowing patterns, moisture and wear, but bentgrass does not usually produce the strong, obvious grain effect found on Bermuda.[9] If you are playing bentgrass, spend most of your reading time on slope and speed. If you are on Bermuda, grain needs to be part of the read from the start.
A useful visual check is the grass colour. On Bermuda, grass that appears shiny or lighter is often lying away from you, meaning the putt is likely down-grain. Darker grass often means the blades are facing you, so the putt is more likely into the grain.[2][3] Check the whole route, not just the patch around your ball. A putt can change character halfway to the hole if the grain or slope changes.
This is not a reason to blame every missed putt on grain. Most of us under-read the basic slope before grain becomes the deciding variable. But on Bermuda, ignoring it is a real mistake. On bentgrass, over-reading grain is just another way to complicate a putt that needed a simpler decision.
Read the green while you are still walking toward it
The best first read comes before you mark the ball. As you approach the green, look for its general fall: where is the high side, where is the low side, and where would water run after heavy rain?
Water drainage is one of the most useful broad clues because greens are built to shed water. The low area is often where water would collect or exit, while the higher area is generally uphill from it.[1][2] That does not mean every putt automatically breaks toward a nearby pond, creek or distant valley. Local contours can overrule the overall terrain. But drainage gives you a starting map before you get trapped staring at the final three feet of a 25-footer.
Find the highest visible area of the putting surface first. Then ask how your ball sits relative to that point and how the hole sits relative to it. If the ball is below the high point and the cup is farther down the fall line, you are dealing with some version of a downhill putt. If the green pitches from right to left across the route, expect the ball to move left as it slows.
This is where a lot of mid-handicap players, myself included, lose strokes by treating the putt as one flat line with a little bend at the end. A green is usually a collection of small slopes. The first task is to identify the dominant one, not to calculate a perfect geometric answer.
Golf Course Industry notes that the USGA recommends a maximum green slope of 2 percent for fairness, which is a two-foot drop over 100 feet.[8] That is a useful benchmark, not a promise that every green you play stays under it. Steeper sections exist, especially around edges, tiers and older or more dramatic designs. Even a slope that does not look severe can move a ball significantly once green speed enters the equation.
Before choosing a line, establish the day’s speed
A line without a pace is not really a read. It is a guess.
Green speed is commonly measured with a Stimpmeter, a device invented by Edward S. Stimpson in 1935.[6] A reading of 7 or lower is generally considered slow, 8 to 10 medium, and 11 to 13 fast.[6] The number describes how far a ball rolls under a standardized release. It gives you a better reference than calling greens “quick” because the group in front left a few downhill putts six feet past.
If the club posts a Stimpmeter reading, use it as context. If it does not, hit your early lag putts with some attention. The first few greens are not just warm-up strokes, they are information gathering. Notice whether an uphill 20-footer needs a firm strike, whether downhill putts keep releasing, and whether balls are stopping quickly around the hole.
Faster greens generally require a softer delivery, which leaves the ball more time to respond to slope. That often means more break. But “fast greens break more” is not a fixed conversion chart. The actual amount depends on slope, grass type, moisture and the intended pace.[4][6] There is no reliable evidence for a universal rule such as “add six inches of break for every Stimp point.” Anyone offering that level of precision without seeing the green is selling certainty that the putting surface does not provide.
My rule for practical play is simpler: on quick greens, choose a pace that would finish only a short distance beyond the hole if it misses. Then read for the break created by that speed. On slower greens, a firmer strike can hold a straighter line for longer, but it also reduces the effective target size if you hit it too hard.
Use two views, then make a decision
Once the ball is marked, read from behind the ball first. This is where you see the overall route from ball to cup. Squat down if it helps, but do not turn it into a yoga routine. You are looking for the direction of the slope, the point where the putt begins to fall, and whether the final few feet are steeper than the opening section.
Then walk to the low side of the putt. Looking uphill from below the line often makes the tilt easier to see, especially on subtle putts.[1][13] The low-side view is useful because it confirms whether the break you saw from behind the ball is real or whether your eyes were fooled by the surroundings.
The key is to use these as complementary views, not to keep collecting opinions until you are more confused than when you started. Relying on one angle is a common amateur error, but so is overcomplicating a six-foot putt by circling it five times.[12] Take the behind-ball view, take the low-side view, check grain if it is Bermuda, then commit.
A practical sequence:
- From your approach, identify the green’s general high and low points.
- Behind the ball, decide whether the putt is uphill, downhill or mostly sidehill.
- From the low side, confirm the direction and severity of the side slope.
- On Bermuda, check whether the grass is shiny or dark along the intended line.
- Choose a pace.
- Pick one start line and hit it.
That last step matters. A player who keeps changing the line over the ball has not improved the read. They have just made the stroke harder.
Treat the last third of the putt as the priority
For most breaking putts, the final third near the hole deserves the closest attention. The ball is moving slowest there, so the slope has more opportunity to influence it. If the cup sits on the side of a ridge, or the final few feet run across a visible fall line, that section can determine the miss even when the opening of the putt looks nearly straight.
This is also why golfers commonly under-read. We tend to aim based on what the putt looks like at address, then get surprised when it turns sharply near the cup.[11][12] Instead, stand behind the hole briefly and look back toward the ball. Ask a direct question: when the ball arrives at dying speed, which side of the hole will the slope pull it toward?
For a downhill putt, be especially conservative with speed. A ball struck too firmly has less break, but it is also more likely to race past and leave the same slippery putt coming back. The sensible target is a pace that lets the ball enter on the high side and lose speed near the hole, not a jab that forces the ball through a line it would not otherwise hold.
Adjust when weather changes the surface
Do not use the morning’s read unchanged in the afternoon.
Wet greens are slower, and available guidance suggests moisture can reduce break by roughly 25 to 50 percent.[7] That is a broad range, which tells you the important part: do not treat it as a calculator. A wet green may need a firmer stroke and show less lateral movement, but the effect depends on how much water is present, the grass and the underlying slope.
Wind is another adjustment, particularly on exposed greens. A strong wind can alter both pace and line, and its effect is not limited to whether it is helping or hurting the putt. Wind relative to the slope matters. A crosswind can influence a slow-moving ball late in the roll, while a headwind may make a downhill putt die sooner than expected.[15] On a breezy day, pay attention to the grass, flag and feel of your first few putts rather than trying to apply a fixed wind formula.
Again, the number belongs to the green and conditions that produced it. A 10-Stimp green in dry afternoon wind is not the same putting problem as a 10-Stimp green after rain.
Use technology as a map, not a substitute for looking
Green-reading books and apps can help on unfamiliar courses. PuttView, Strackaline and GolfLogix offer green-contour or green-reading information in different formats, while GolfLogix and GolfPad are among the mobile options used for course management and putting information.[17][18][19] These are aids, not proof that a putt will break exactly as shown. The map cannot fully account for today’s moisture, mowing direction, grain or wind.
A slope-adjusted laser rangefinder or a GPS system can also help with the approach that creates the putt, though it does not read the final roll for you. The Bushnell Tour Hybrid is one example of a device combining rangefinding and GPS-style course information, while GPS systems can provide green-position and putting-reference data.[5][16] Use that information to avoid leaving yourself above a hole location or on the wrong tier, then read the actual putt with your eyes.
For practice, an adjustable indoor mat such as the PuttOUT AirBreak can be useful for rehearsing how changing slope alters start line and pace. It will not replicate Bermuda grain, a 12-Stimp course green or wind, but it can make you more honest about how often you start a breaking putt on the wrong line.[18]
The most useful improvement is still a repeatable process. Read the overall slope early, account for grass type, judge speed before line, check from behind the ball and the low side, then stop gathering information and make a committed stroke. Most putting gains do not come from finding a magic aim point. They come from making fewer rushed reads, fewer under-reads, and fewer guesses disguised as confidence.
Frequently Asked Questions
How does grass type affect reading greens in golf?
Grass type significantly influences how you read a green. On Bermuda grass, grain direction matters a lot because down-grain putts can run 20 to 30 percent faster and break more than into-grain putts. Bentgrass, on the other hand, shows minimal grain effect, so players should focus more on slope and speed rather than grain when putting on bentgrass greens.
What is the best way to read the slope on a golf green?
The best way to read slope is to observe the green from multiple angles while walking toward it. Identify the highest visible point on the green and note where water would naturally drain after rain, as greens are designed to shed water downhill. Understanding the general fall of the green helps you determine whether the putt is uphill, downhill, or breaking left or right.
How do you determine green speed when reading greens?
Green speed is often measured with a Stimpmeter, which provides a numerical value indicating how far a ball rolls on a standardized release. Readings of 7 or lower are slow, 8 to 10 medium, and 11 to 13 fast. If no official reading is available, you can gauge speed by paying attention to your early lag putts, noting how far balls roll and how much force is needed.
Why is it important to check grain on Bermuda greens?
Grain on Bermuda greens can significantly affect putt speed and break because the grass blades lie in a particular direction. A putt going down-grain will roll faster and break more than one going into the grain. Checking grain direction by observing grass color—shiny or lighter grass often indicates down-grain—helps avoid misreading putts on Bermuda surfaces.
What are the steps to read a green before putting?
First, observe the green’s overall slope and high points while walking toward it, noting water drainage patterns. Second, identify the dominant slope affecting your putt by comparing the ball and hole positions relative to the high point. Third, assess the green speed using a Stimpmeter reading or by testing early putts. Finally, incorporate grain direction if playing on Bermuda grass before choosing your line and pace.
Sources
- 7 tips for reading greens more effectively
- Stop Guessing And Start Paying Attention! You Could Be Missing 4 Pivotal Green Reading Clues
- How To Read Greens
- How To Read Greens In Golf: Speed And Break
- Golf Cart GPS Systems: Understanding Putting and Reading Greens - Golf Cart GPS - Pace of Play Golf Management Software
- Understanding Green Speed (Stimp Meter Explained): How Course Conditions Affect Your Game – Golf Pro Guides
- How Course Conditions Dictate Golf Betting | Webopedia
- Slippery Slopes - Golf Course Industry
- Bentgrass Greens: What Are They, Pros, Cons, & Tips
- 5 Grasses Every Golfer Should Know - LINKS Magazine
- Finally Read Greens: 7 Secrets Weekend Golfers Use (Works Fast)
- Mistakes When Reading the Green: What You Should Avoid
- How to Read a Golf Green: A Step-by-Step Guide for Amateur Golfers
- The Complete Guide to Reading Greens in Golf: Tips, Techniques & Tools – Green Books
- Putting in the Wind, Part II: Make Adjustments for Speed, Line
- Reading Greens with a Laser: Pro Method (2026) – Mileseey Golf
- PuttView vs Strackaline vs GolfLogix 2026: Best Green Reading Book Comparison
- Top Apps For Green Reading And Course Management (2025 Edition)
- Best Golf Apps in 2026: Choose by the Way You Play
Related Articles

Handle Pressure in Golf Tournaments: Mental Game Strategies
Learn how to handle pressure in golf tournaments with routines, breathing, and course strategy to improve your mental game under stress.
How to Choose the Right Golf Course Using Course and Slope
Learn how to choose the right golf course by understanding course and slope ratings to match your skill and carry distances.
How to Read a Golf Scorecard: A Complete Beginner's Guide
Learn how to read a golf scorecard, understand tees, yardage, par, and stroke index to track your score accurately on the course.

Golf Handicap System Explained
Learn how the golf handicap system works, including Handicap Index, Course Rating, and Slope Rating, to understand your scoring potential.