
How to Read a Golf Course Map for Better Play
Learn how to read a golf course map, interpret symbols, confirm distances, and plan shots effectively for improved course strategy.
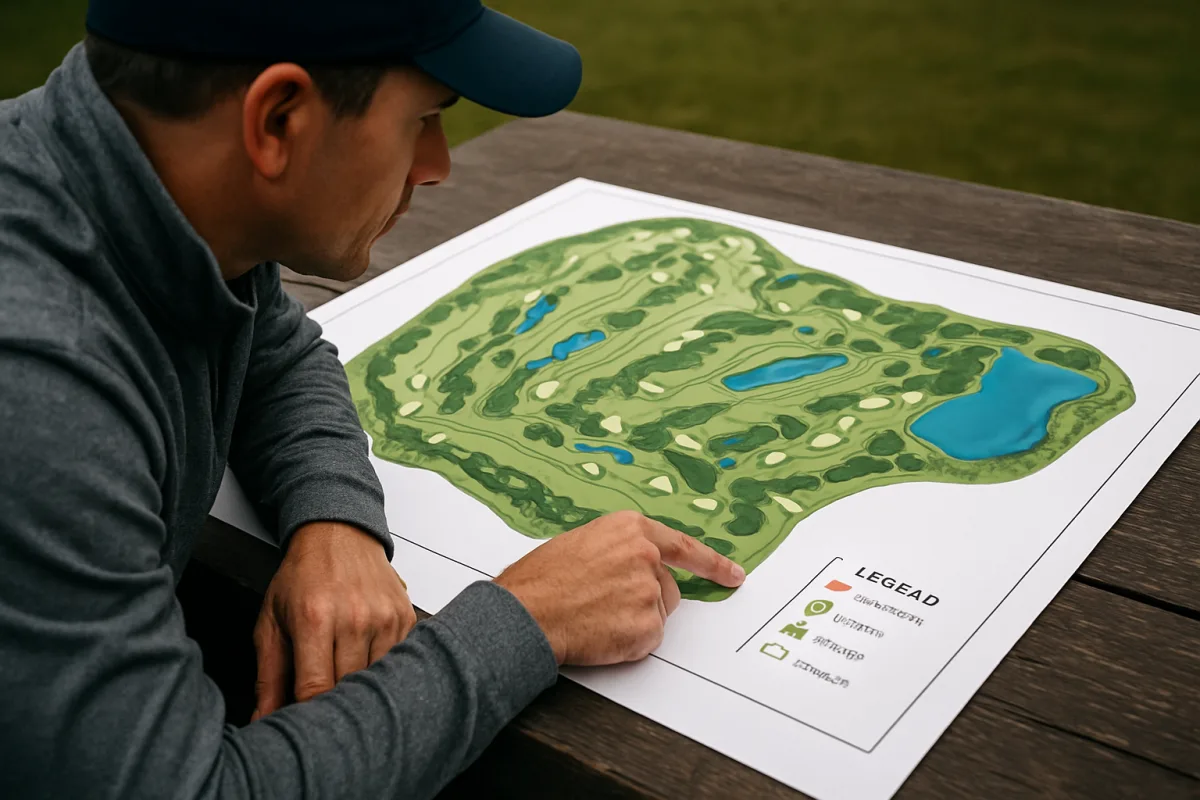
Check the legend before you plan a shot
You have the map open on the first tee, and the temptation is to find the green, see the yardage, and pull driver. Start smaller. Find the legend and identify how this course marks water, bunkers, boundaries, slopes, and distances. [1][2]
Most maps show water with wavy blue lines or shaded blue areas. Bunkers usually appear as irregular tan or yellow shapes, sometimes filled with dots or stippling to separate sand from closely mown grass. [1][3]
Out-of-bounds areas are commonly drawn with solid white lines or white regions, matching the white stakes you may see on the course. A white boundary line on the map should change your target choice before you worry about maximizing carry distance. [1][2]
The symbols are familiar, but they are not universal enough to skip the legend. A blue feature may be water on one map, while local ground-condition markings and other color choices can differ by country and course. [1][17]
We would take 30 seconds at the first tee to learn the map’s language. That is cheaper than discovering on the fourth hole that the pale strip beside the fairway was a penalty area, a boundary, or a no-play area.
Confirm the unit before you select a club
Look for yards or meters beside the hole length and on every distance label. The United States, Canada, Mexico, the United Kingdom, Ireland, Japan, and Korea commonly use yards, while much of continental Europe, Australia, New Zealand, South Africa, Singapore, and Malaysia use meters. [8]
That changes the number you need to hit. A 150-meter approach is farther than a 150-yard approach, so carrying over a familiar-looking number from a home course can leave you short by a club or more.
International professional tours often display both yards and meters, but many course maps do not. [8] If you travel, check the unit on the scorecard, map, GPS setting, and any on-course marker before treating a number as a stock-yardage decision.
In the United States, fairway distance markers often use red for 100 yards, white for 150, and blue for 200. They are reference points, not guarantees that your ball is exactly that distance from the green. [3][12]
Use the marker to orient yourself, then read the map or GPS for the remaining distance. If the map gives front, center, and back numbers, do not automatically play the center number when a front bunker or back trouble makes another target safer. [7]
Trace the hole from tee to green
Follow the intended route from the teeing ground to the green before you decide on a club. Find the direction of the hole, where the fairway turns, where it narrows, and which side leaves the cleaner next shot. [2][12]
A map makes a dogleg easier to see than the view from behind the ball. Mark the point where the fairway bends, then compare it with the distance you normally carry and the total distance your tee shot tends to travel.
Do not confuse the straight-line route to the green with the route your ball can actually use. Trees, bunkers, water, and out-of-bounds lines may make the visually shortest line a poor line for a mid-handicap player. [1][2]
Choose a landing zone with room on your usual miss side. If your common tee shot fades, a map showing water or out of bounds down the right should push your target farther left, assuming that side leaves playable space. [2][12]
This is where a course map helps you play your own round. It cannot turn a 235-yard tee shot into a reliable 270-yard carry, and a drawn fairway corridor cannot tell you that today’s swing will find its center.
Mark the hazards that affect your landing area
Once you know the route, identify every hazard that reaches the shot you are about to hit. A bunker 40 yards beyond your normal drive may be irrelevant, while one 15 yards inside your usual total distance deserves your full attention. [2][12]
Read the shape of bunkers, not only their presence. An irregular tan shape that cuts diagonally into the fairway can remove one side of a landing zone, even if its nearest edge appears well away from your intended line. [1][3]
Water often looks straightforward on a map because blue shading is easy to spot. Check whether it crosses the fairway, runs alongside it, protects the front of the green, or sits beyond the green waiting for a shot that flies long. [1][2]
Out of bounds deserves a separate decision because it is commonly marked with a white line or region. [1][2] If the map shows a white boundary tight to one side, give yourself a target that keeps your normal dispersion away from it.
A map does not tell you the exact condition of every bunker or the firmness of every landing area. It does tell you where the trouble is positioned, which is enough to decide whether driver, a fairway wood, or an iron gives you the wider margin.
Choose a layup number, not only a tee-shot number
On a par 5 or a long par 4, use the map to find the distance that leaves your preferred approach rather than trying to hit every shot as far as possible. Look for bunkers, water, or narrowing fairway sections that sit at common layup distances. [2][12]
A good layup target has a clear landing area and leaves an approach you can cover without bringing front trouble into play. The map lets you see whether laying up to a round number actually places your ball beside a fairway bunker.
Check the green’s approach shape as well. If water or bunkers protect the front, a layup that leaves a longer approach may require a club with less stopping power, which can make the “safe” tee decision less safe in total. [2][12]
We would favor the route that removes the biggest penalty from the hole. For many mid-handicap players, avoiding out of bounds or a forced water carry will save more shots than squeezing an extra 15 yards from a driver.
Allow for elevation without inventing a formula
Contour lines on a map can show elevation and slope, and some digital maps add color gradients or arrows to indicate severity and direction. [4][5] Use them to recognize that a shot plays uphill or downhill, not to apply a rigid yards-per-foot calculation.
Elevation does not produce one fixed distance adjustment for every shot. The effect changes with the shot, trajectory, wind, landing conditions, and the golfer producing the strike, so a linear formula can create false confidence. [13]
If the hole climbs steadily from tee to green, expect the map’s horizontal yardage to understate the playing demand. If it drops sharply, the shot may require less carry distance, but trouble beyond the green can become more relevant. [13]
Do not let an uphill view persuade you to swing harder without checking the carry required over a bunker or water. Choose the club for the carry you need and the landing area available, then make your normal swing.
Read the green before you commit to the approach
As you get closer, shift from the hole’s overall route to the green’s shape. Green maps can use contour lines, color changes, and directional arrows to show elevation, slope severity, and likely break direction. [4][5]
A contour pattern can reveal a raised front, a fall-off behind the putting surface, or a side slope that feeds shots toward trouble. That information should influence your approach target, not only your first putt.
Greens in the United States average roughly 5,500 to 6,600 square feet, but individual greens vary widely. [9] Do not assume a middle-of-green target is automatically safe when the map shows a narrow section, a severe slope, or hazards tight to one edge.
For putting, read the larger slope first. A green map can show the general direction water would run, while the putt itself may still be affected by smaller contours near the ball and cup. [4][15]
Ignoring green slopes leads to poor putting decisions, especially when a player reads only the line near the hole. [15] Use the map to form an early picture, then confirm it with what you see and feel around the green.
Use GPS for live distances, not automatic decisions
Paper maps are strong for seeing the design of a hole, but GPS devices and apps add live distances to the front, center, and back of greens, hazards, and layup points. [7][11] Many also advance holes automatically and include green-undulation displays. [11]
That helps when you are standing in a fairway with no clear yardage marker or when a dogleg hides the next landing area. GPS can also show detailed hole layouts and connect with performance-tracking systems, including Arccos Air. [11]
Some GPS systems offer maps and live scoring across more than 43,000 preloaded courses. [11] The coverage is appealing, but do not treat a screen distance as a complete club recommendation.
GPS cannot decide how your current swing will strike the ball, whether you will launch it higher or lower than normal, or how much an uphill lie changes contact. Golf Tech Review’s warning is the right one: your GPS is not a caddie. [10]
Use front, center, and back yardages to identify the portion of green you can cover. Then use the map’s hazards and contours to decide where you want the ball to finish, which may not be the flag or the center.
Keep Slope Rating out of your hole strategy
Do not use Slope Rating as a guide to whether the next hole is difficult. Slope Rating describes the relative difficulty of a course for bogey golfers compared with scratch golfers, not the exact challenge of a particular tee shot or approach. [14]
A high Slope Rating does not tell you where the fairway narrows, where water enters play, or which green has the biggest contour. The map and the hole-by-hole yardage information answer those decisions. [14][16]
Before each shot, return to the same sequence: confirm the unit, identify the target, find the penalty areas and bunkers, check elevation and green shape, then choose the club that fits your normal pattern. [2][4][13]
That sequence will not erase every bad swing, and no map can promise a score. It will stop you from losing strokes to hazards and distances you could have seen before you pulled a club.
Frequently Asked Questions
How do I interpret symbols on a golf course map?
Start by checking the map’s legend because symbols and colors can vary by course. Water hazards usually appear as wavy blue lines or shaded blue areas, bunkers as irregular tan or yellow shapes often with dots, and out-of-bounds areas are marked with solid white lines or white regions. Confirming these symbols before play helps avoid confusion during the round.
What should I check on a golf course map before playing?
Always confirm the measurement units, yards or meters, since they differ by region and affect club selection. Also, review the legend to understand how hazards, boundaries, and distances are marked. Tracing the hole from tee to green on the map helps identify doglegs, fairway width, and hazard locations to plan safer shots.
How do I use a golf course map to plan my shots?
Use the map to select a target and layup area rather than just aiming for the longest possible shot. Follow the hole’s route on the map to find safe landing zones, considering your typical shot shape and common misses. Avoid aiming at the straight-line distance if hazards or out-of-bounds areas make it risky.
Why is it important to confirm yards vs meters on a golf map?
Yards and meters represent different distances; for example, 150 meters is longer than 150 yards. Using the wrong unit can lead to choosing an incorrect club and coming up short or overshooting. Since many countries use different units, always verify the measurement system on the scorecard, map, or GPS before deciding on a shot.
How can a golf course map help avoid hazards during play?
By showing the locations of water, bunkers, out-of-bounds lines, and other hazards, the map allows you to plan shots that steer clear of trouble. Identifying these areas in advance helps you pick safer targets and avoid penalty strokes. The map also reveals doglegs and narrow fairways where hazards may be concentrated.
How we researched this
This article was assembled from 17 cited references.
Nothing here is based on hands-on testing. Where a figure or finding appears, it belongs to the source cited beside it, and the writing says so rather than implying otherwise. Every source is listed below so you can check it.
Sources
- How Do I Understand Golf Course Maps?, The Golf Xpert | Mighty Golfer
- How to Read a Golf Course Map
- Golffoxwood Course Map & Yardage Guide
- How to Read a Golf Green Map: Slopes and Contours, BirdiLens
- Golf Green Maps: Slope & Break on 25,000+ Courses | TheGrint
- How a course is measured here | GolfCourseGeek
- Golf GPS App, Yardages to the Front, Center and Back of Every Green | GolfCore
- Yards vs Metres In Golf: Which Countries Use Which?
- How golf course size has evolved - GCMOnline.com
- Your GPS is not a caddie. Stop treating it like one., Golf Tech Review
- Golf Rangefinder Vs GPS: Which Is Best For You In 2026?, MoreSports
- Sprinkler heads, cart GPS and the scorecard: how to read a course map
- Plays longer, plays shorter: uphill and downhill, Lince Golf
- Slope Rating and Course Rating Explained | ParPath
- How to Read a Golf Green: A Step-by-Step Guide for Amateur Golfers
- How to Read a Golf Yardage Book, Step by Step
- Markers - areas and zones in golf | Golf course
Related Articles

How to Play Golf in Cold Weather
Learn how to play golf in cold weather with tips on swing, clothing, equipment, and course strategy for optimal cold-weather golf performance.

Improve Golf Course Management
Learn how to improve golf course management with club selection, aiming strategies, and adapting to conditions for better scoring.

Golf Rain Gear and Strategy: What to Do If It Rains
Learn essential golf rain gear and strategies to stay dry, adjust your swing, and play safely when it rains on the course.
How to Read a Golf Scorecard: A Complete Beginner's Guide
Learn how to read a golf scorecard, understand tees, yardage, par, and stroke index to track your score accurately on the course.